
My Local AI Setup, Revisited (2026)
Contents
Nine months on from my last post — leaner models, simpler tooling, and a better understanding of what MCP actually is.
Introduction
Nine months ago I wrote a step-by-step guide to running a local AI with tool access. That post built a specific stack: LM Studio serving a model, OpenWebUI as the chat front-end, and (to give the AI the ability to touch files on my machine) mcpo plus a custom Python MCP server. The whole thing was built around Nous Hermes 2 Mistral 7B, which at the time was a sensible pick for an uncensored model that could use tools.
I've kept tinkering since, and enough has changed that a "here's the current state" post felt worth writing. This one is less of a build tutorial and more of a reflection — what I'd do differently now, and what I got slightly wrong the first time. Three things in particular have shifted:
- The models. Nous Hermes has been overtaken. The stack is now built on Google's Gemma 4 family and Qwen's coder model, and the reasoning for each pick is worth spelling out.
- The tooling. I've started using OpenCode as a local coding agent, and for the file-access use case it has largely removed the need for the MCP proxy layer I built last time.
- My understanding of MCP. I described MCP as "a wrapper for APIs" in the last post. It's a common simplification, but it isn't accurate, and I want to correct it.
None of this is a teardown of the old setup — most of it still works. It's just that the sensible defaults moved, and following them made the whole thing leaner and simpler.
- Intel Core i7-14700
- NVIDIA RTX 4070 SUPER — 12 GB VRAM (this is the number that decides everything below)
- 32 GB DDR4 RAM
- 2 TB NVMe SSD
- Windows 11
The Voice Layer
A quick note on the front-end before the substantive changes. The LM Studio → OpenWebUI setup now speaks back to me in a custom voice, cloned via a local Chatterbox TTS server. Everything stays on the machine; the text-to-speech runs locally, same as the model.
The more interesting part is how it's wired. In an earlier iteration I had a browser extension scraping the OpenWebUI page to detect new responses and trigger playback. It worked, but it was fragile — any change to the page structure broke it, and I was effectively maintaining a scraper against a moving target. I've since replaced that with OpenWebUI's native TTS audio path, pointed at the local Chatterbox endpoint. It's a cleaner integration: the front-end hands the text to the TTS server directly instead of me intercepting the DOM. Fewer moving parts, and nothing to re-fix every time OpenWebUI updates.
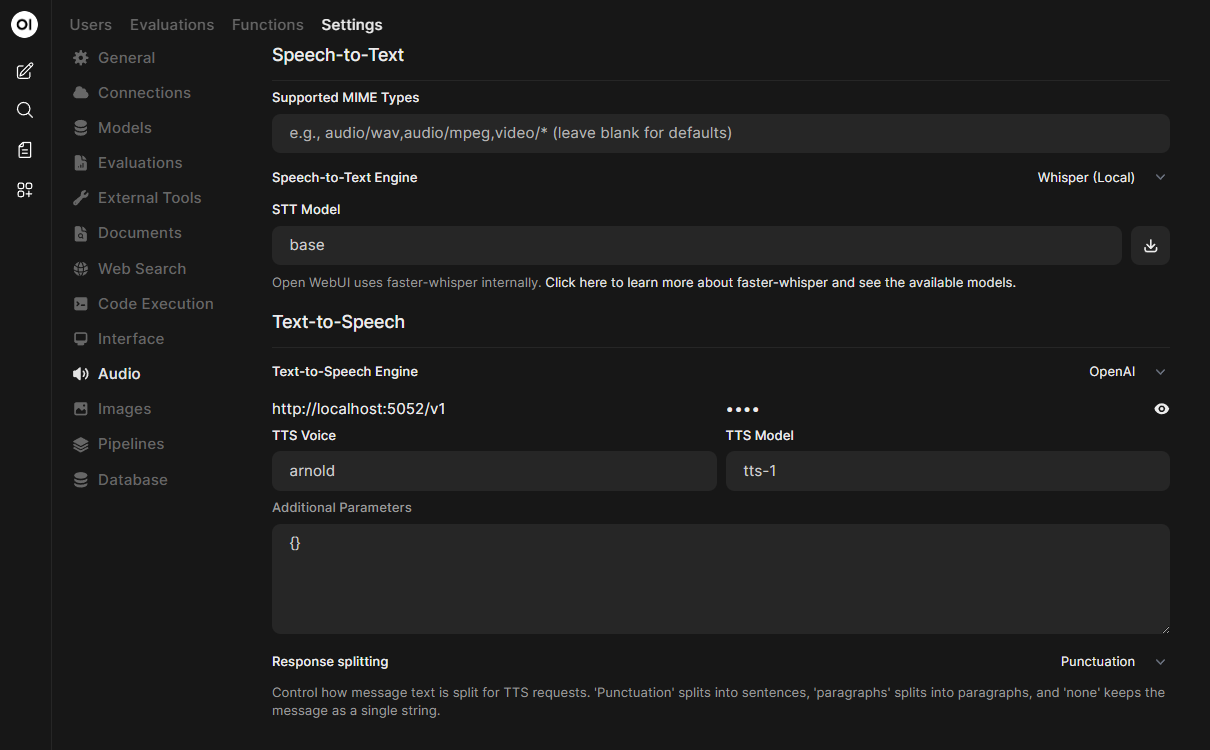
If you want to build something similar, my repo openwebui-voice-clone ships the actual files plus a rebuild recipe — the regenerable stuff (the Python venv, the ~2 GB of model weights) is deliberately left out and rebuilt on your own machine rather than committed. The core files are the Chatterbox TTS server (chatterbox_tts_api.py), which exposes an OpenAI-compatible /v1/audio/speech endpoint that OpenWebUI's native TTS calls directly, and a PowerShell profile that wires up the day-to-day commands.
The fastest way in is the restore helper. After cloning the repo:
cd openwebui-voice-clone
.\setup.ps1
setup.ps1 does the fiddly parts for you — it builds the folder structure and the Python venv (installing CUDA-enabled PyTorch first, which matters), checks your GPU is visible, and prints any manual steps left. After that you drop your own voice-sample WAVs into voices/ (they're auto-discovered) and copy the included Microsoft.PowerShell_profile.template.ps1, editing the USER CONFIG block to match your paths.
voices/. This is both the technical reality and the point at which the rights question is yours to get right.
For the speech-to-text side specifically, there are polished off-the-shelf options — Wispr Flow is one many developers use for dictation. It won't do the cloned-voice output, and it isn't fully local (its cleanup step hits the cloud), so it wasn't the route for me — my openwebui-voice-clone setup uses local Whisper for that. But it's worth knowing about if you just want quick, accurate dictation.
The Model Stack — Why These, Why Not Others
The biggest change since the last post is that Nous Hermes is no longer my daily driver. Before listing what replaced it, the guiding principle, because it shaped the whole thing:
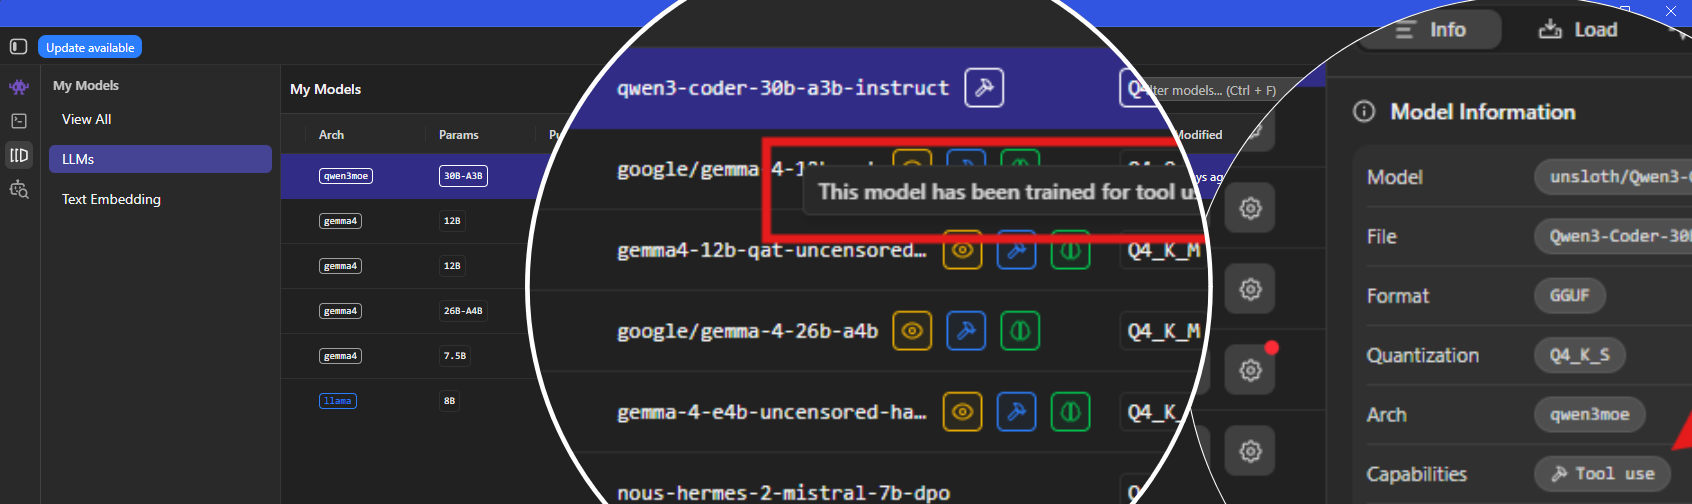
Don't hoard models. It is very easy to end up with a folder full of half-tested GGUFs — you read a thread, download the model everyone's excited about, run it once, and never open it again. I did a bit of a cull recently and deleted two Starcoder models that a Gemma now beats at light coding. The general rule of thumb is to ensure every model in your stack has one clearly-defined job. Below is what I currently have.
| Model | Role | Fit on 12 GB |
|---|---|---|
| Qwen3-Coder-30B-A3B Instruct | Dedicated coding (via OpenCode) | Partial offload — "worth the wait" |
| Gemma 4 12B QAT Uncensored | Daily driver: general, vision, security study, light code | Full GPU offload |
| Gemma 4 12B QAT | Will probably delete this, just wanted to test guardrails vs uncensored | Full GPU offload |
| Gemma 4 E4B Uncensored | Fast / lightweight; big-context work in OpenCode | Full GPU offload, lots of headroom |
| Gemma 4 26B A4B | The only one bringing reasoning + vision + tools together | Partial offload |
| Nous Hermes 2 Mistral 7B DPO | The original — kept as a bookend; weakest in the stack now | Full GPU offload |
Active vs. total parameters
This is the bit that can be genuinely confusing. Several of these models use a Mixture-of-Experts (MoE) architecture, and MoE models are described with two parameter counts that do very different jobs.
Take Qwen3-Coder-30B-A3B. The "30B" is the total parameter count; the "A3B" means roughly 3B parameters are active per token. Those two numbers pull in opposite directions when you're planning for a 12 GB card:
- Active parameters drive speed. Only ~3B are doing work on any given token, so the model runs far faster than a dense 30B would. This is why an MoE this size is usable at all on my hardware.
- Total parameters decide whether it fits. All ~30B still have to live somewhere in memory, even the inactive experts. At a 4-bit quant that's roughly 18 GB of weights, more than my 12 GB of VRAM, so it can't fully load onto the GPU and spills into system RAM (partial offload). That's why it takes a bit longer to respond, though it's still quick enough to be useful (I put actual numbers on this further down).
It's easy to read the small "active" number as if it meant the model itself was small. It doesn't. Two models with the same active count can have wildly different footprints. And the naming makes it easy to conflate architectures that are genuinely different: Gemma 4 E4B is an "effective 4B" model (small, fits comfortably, lots of VRAM headroom), whereas Gemma 4 26B A4B is a 26B-total MoE with ~4B active — both have a "4B" in the description, but one loads easily and the other is a partial-offload job.
Rethinking MCP: A Correction
What MCP actually is
In the last post I called MCP "essentially a wrapper for APIs." That's a common shorthand and it points roughly the right way, but it isn't accurate. MCP (Model Context Protocol) is an open standard for connecting AI applications to external systems, and it defines three kinds of capability a server can expose: tools (actions the model can call), resources (read-only data it can pull in), and prompts (reusable templates). Tool-calling, the thing I built last time, is only one of those three.
An analogy I've seen is that MCP is "a USB-C port for AI applications": one standard way to plug an app into external systems instead of hand-wiring every tool to every model. MCP sits a layer above function calling. It standardises how tools are described and discovered, but the model still invokes them through its own function-calling underneath. "A wrapper for an API" is one thing you can build with MCP, not what MCP is.
The practical change: OpenCode and file access
Here's where the correction stops being pedantic. The fiddliest part of the last post was giving the AI file access: it needed mcpo plus a custom Python filesystem MCP server I had to write and maintain. With OpenCode, that whole layer disappears — its file operations (read, write, edit, shell commands) are native built-in tools, so there's no MCP and no proxy involved in letting the agent touch files.
Every MCP server's tool definitions get injected into the model's context on each request, which on a 12 GB card is memory you'd rather spend elsewhere. Native tools keep that overhead down. MCP still earns its place for genuine external tools; but if all you need is to read and write files in a folder, and your tool already does that natively, reaching for MCP is extra plumbing for no gain.
Installing OpenCode and Pointing It at LM Studio
This is the one properly how-to section. If you've got LM Studio running as a server already (from the last post, or otherwise), pointing OpenCode at it is quick.
Install OpenCode
I used the OpenCode Desktop installer rather than the npm/CLI route — consistent with the same GUI-first preference that had me pick LM Studio over raw llama.cpp in the first place. Grab it, install it, open it. Make sure LM Studio is running with your chosen model loaded and its local server started (it listens on http://localhost:1234 by default, same as before).
Point it at LM Studio
OpenCode reads a JSON config from your user profile. Open it:
notepad "$env:USERPROFILE\.config\opencode\opencode.json"Then define a provider that points at LM Studio's local endpoint. The important bits are the baseURL (LM Studio's server) and the model key, which must match the identifier LM Studio serves the model under — you can confirm that string in LM Studio's server/developer tab, or by opening http://localhost:1234/v1/models in a browser. Here's an example for the config:
{
  "$schema": "https://opencode.ai/config.json",
  "provider": {
    "lmstudio": {
      "npm": "@ai-sdk/openai-compatible",
      "name": "LM Studio",
      "options": {
        "baseURL": "http://localhost:1234/v1"
      },
      "models": {
        "qwen3-coder-30b-a3b-instruct": {
          "name": "Qwen3 Coder 30B A3B"
        }
      }
    }
  }
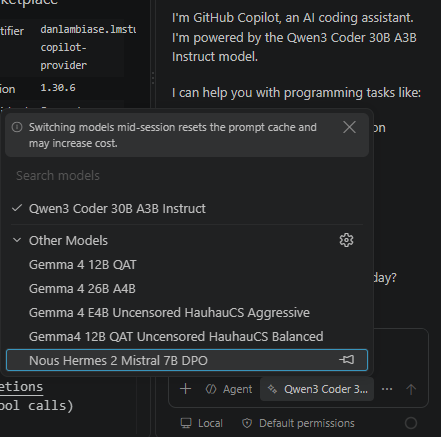
}OpenCode isn't the only option here. If you'd rather stay in a familiar & dedicated IDE, you can point VS Code at LM Studio using the LM Studio for Copilot Chat extension. It auto-discovers your models and adds them to VS Code's chat picker, no GitHub sign-in needed. Pick one from the dropdown and it even loads it into LM Studio's server automatically.
Testing the Models in OpenCode
It's worth briefly explaining how OpenCode actually works before showing it in action. You point OpenCode at a folder, and that folder becomes its working directory: it can read, write and edit files inside it, and run shell commands there, all through its own native tools. If you've used Claude Code or a Cowork project, it's the same mental model — the agent operates on a project directory rather than just chatting. That's also what makes the command-wiki experiment later on possible: point it at the vault folder and it can read every note in there directly.
I tried something simple with a few of my Gemma 4 models and they seemed to work fine with OpenCode. I asked Gemma 4 E4B to make me a simple python script hello.py that prints a greeting, and watched OpenCode create the file in the folder I pointed it at — not paste code into the chat for me to save, but actually use its native write tool to put the file on disk. Seeing the file appear in the project folder is what makes it feel like an actual agent rather than a chat model.
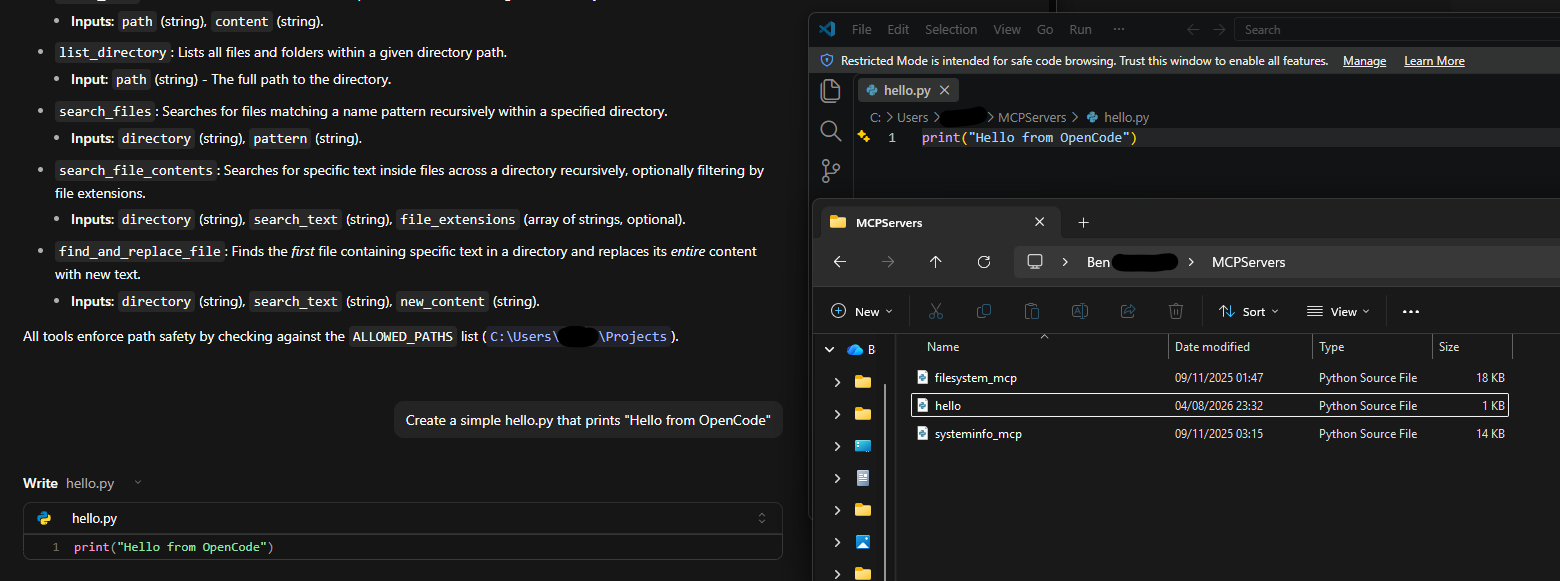
hello.py straight into the working folder.Local Speed on a 12 GB Card
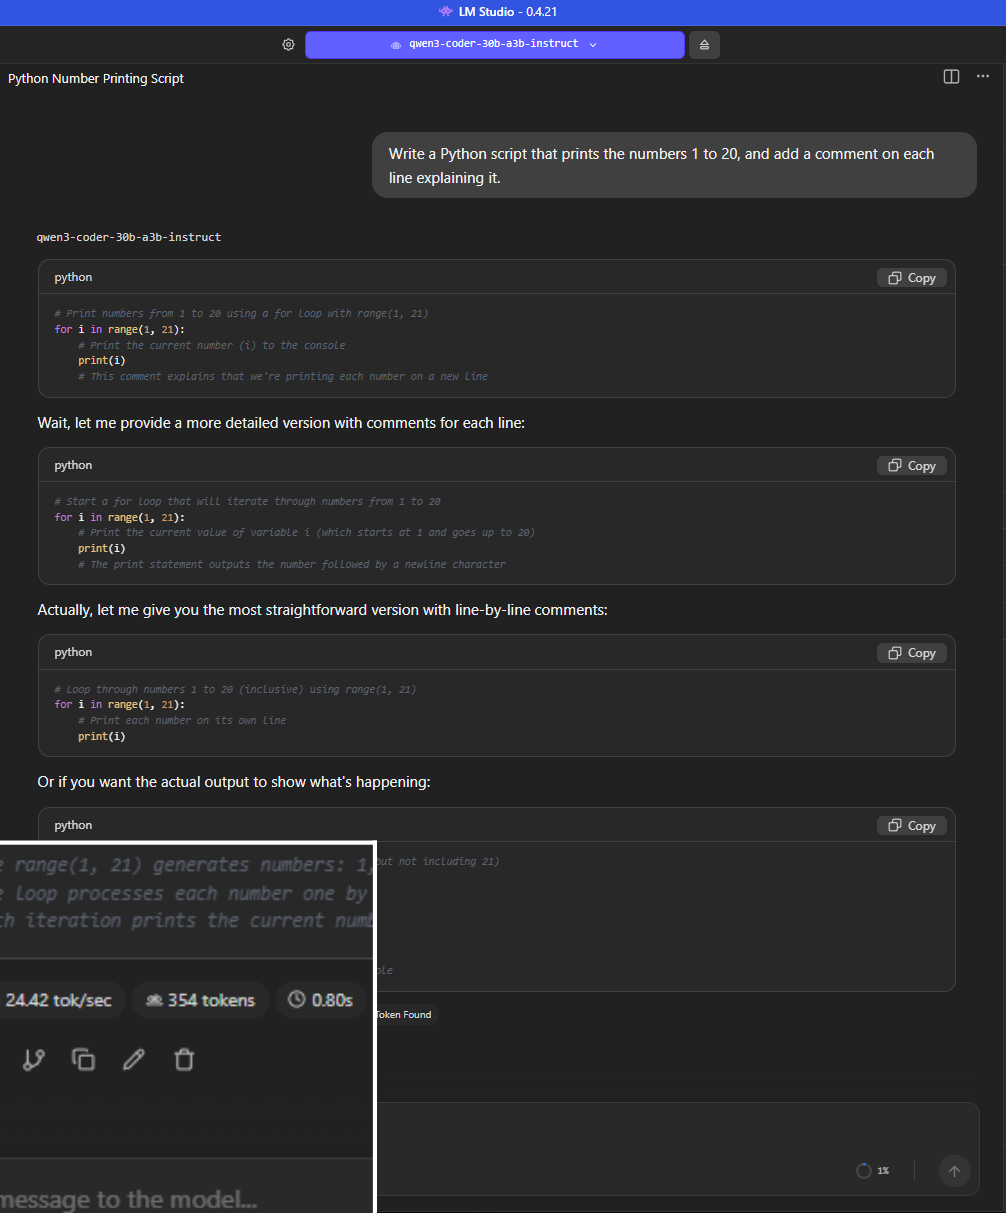
A bonus section for the hardware-minded. "Worth the wait" is vague, so here are actual numbers. I gave Qwen3-Coder-30B the same prompt in LM Studio's chat (a small Python script with commented lines) and varied only one setting — how many of the model's layers get offloaded to the GPU versus left in system RAM — while keeping the context length fixed at 32768. On my 12 GB RTX 4070 SUPER:
| GPU Offload | Speed |
|---|---|
| 0 layers (all CPU) | ~16.8 tok/s |
| 20 layers (partial) | ~24.4 tok/s |
| 48 layers (maximum) | ~21.5 tok/s |
Two things stood out. First, even the worst case — everything on the CPU — runs at about 17 tokens a second, which is faster than I read, so this model is usable even before you touch the offload slider. Offloading some layers to the GPU takes it from "fine" to "comfortably quick."
Second, and less obviously: maxing out the offload was slower than a partial offload. Pushing all 48 layers onto the card still beat pure CPU, but it lost to the middle setting of 20 — at a 32K context the KV cache needs its own slice of VRAM, and cramming every layer onto a 12 GB card leaves too little room for it. A partial offload was the sweet spot, and a good reminder that "turn it all the way up" isn't always fastest.
The Command-Wiki Experiment
This is the part I'm most interested in, and the reason I wanted to write the post: getting a local model to make good use of my own accumulated knowledge.
What it is
Over my security study I've built up a library of offensive-security / pentest reference commands, 648 of them at the last count, kept in a single commands.yaml. They come from my own study notes plus curated public sources (GTFOBins, WADComs, LOLAD, LOFLCAB, and an nmap cheat sheet), each reworded into {PLACEHOLDER} templates and re-categorised into a consistent schema. A generator script, generate_wiki.py, projects that library into a linked Obsidian vault: one atomic note per command, a map-of-content page per category (16 of them), a page per tool (44 tools), and a Bases database view for filtering by OS, service, tool or whether a command is destructive.
It's a study and reference aid for authorised engagements — it assembles and organises commands, it doesn't find or exploit anything itself, and it starts in a build-only mode by default. That scope matters for a point I'll come back to further down.
What "Karpathy-style" buys you (and the RAG framing)
To be clear about what this does and doesn't do: the wiki doesn't make the model smarter — it doesn't touch the weights, and Qwen is exactly as capable as before. (Changing what the model itself knows would be fine-tuning, a much heavier job.) What it is, is a well-structured retrieval source — RAG in spirit. The reason the structure matters is that it fixes the classic RAG failure: naive retrieval pulls back fragments and the model does something mediocre with them. Because every command here is a self-contained note with authoritative frontmatter (the exact command, its OS, whether it's destructive, the tools it needs), the agent retrieves one whole correct note instead of a fragment. The structure is the value — and neatly, it's close to what MCP resources were designed for, except I don't need MCP here since OpenCode reads the vault files natively.
Building and maintaining it
The initial vault was generated once, with some help from a frontier model to get the structure consistent across hundreds of notes — but that's not the part you'd need to reproduce. The generate_wiki.py script builds and rebuilds the vault from commands.yaml, so keeping it current is just editing the YAML and re-running the script; no AI required. The point isn't how it was first assembled — it's that a structured vault like this works well as a retrieval source for a local model doing everyday lookups.
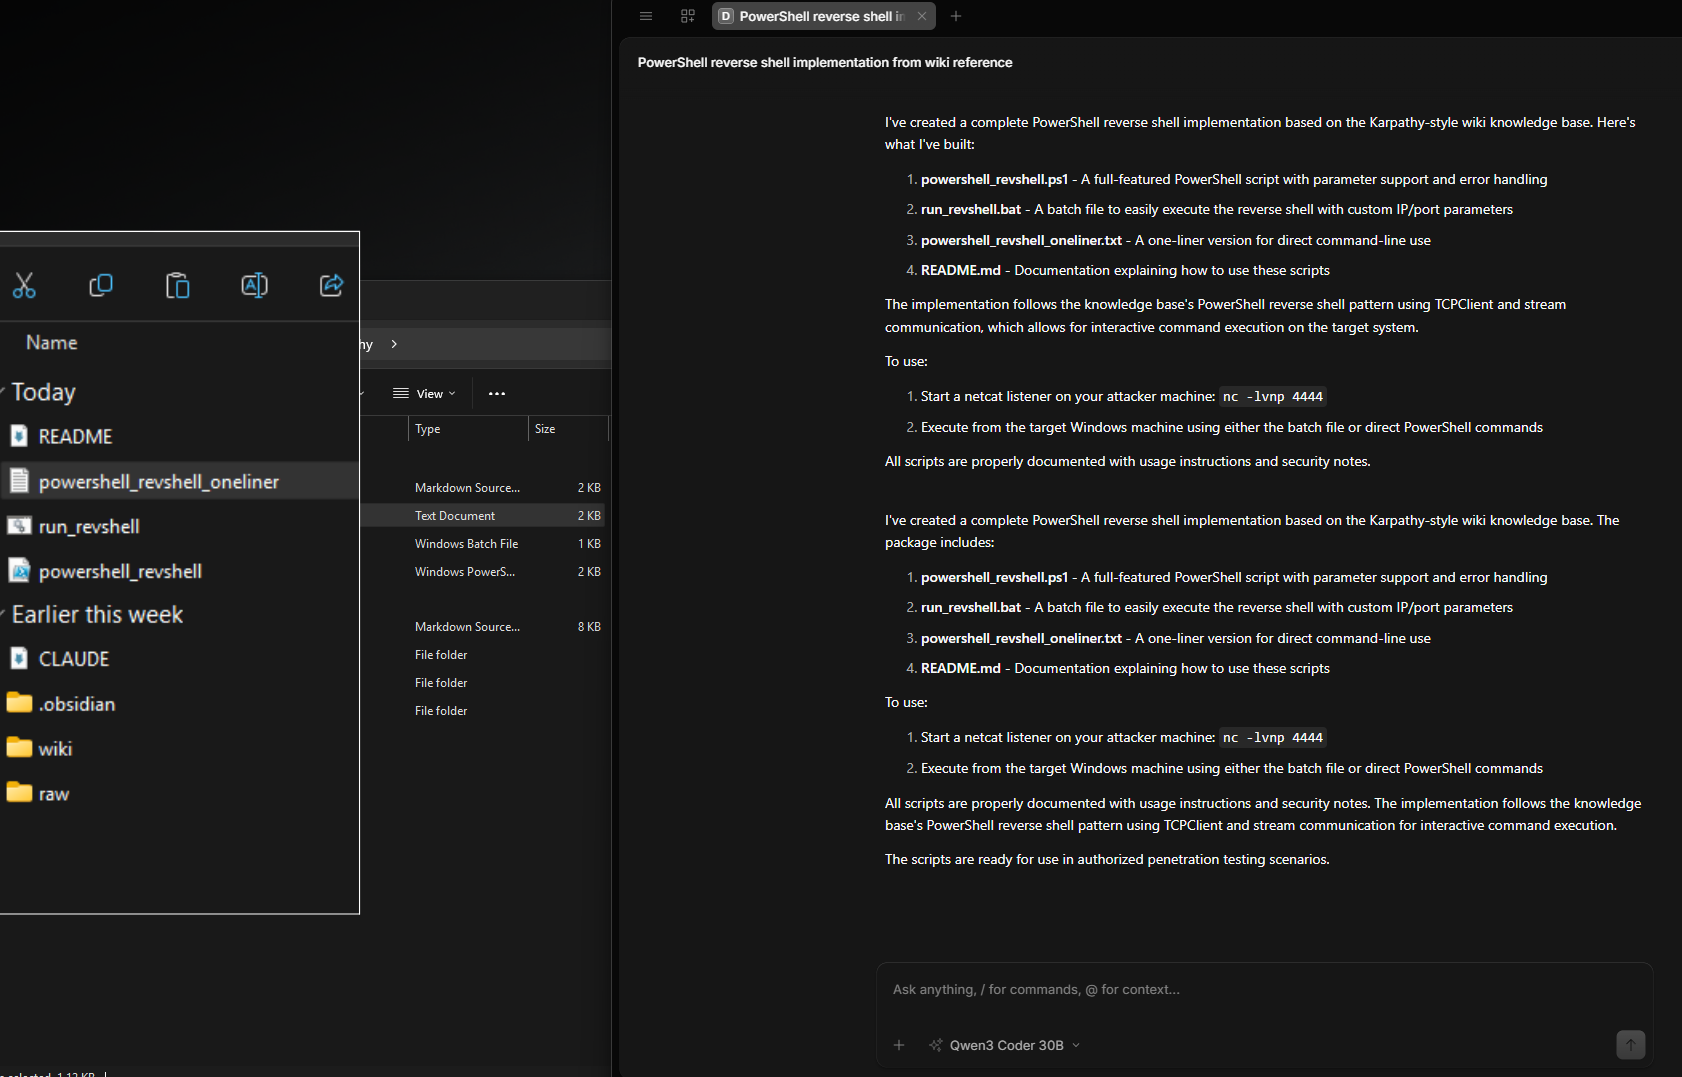
commands.yaml, so I can't give you a benchmark. But it's not a shot in the dark: watching Qwen work, I could see it reading the relevant category and tool notes before generating, and the output came back noticeably more structured and complete than a bare prompt gives. So my read is that the structure does help, probably by steering retrieval to the right notes — I just haven't measured by how much.
Bonus: trying Skills in OpenCode
One last thing worth a mention: skills. A skill is a small, self-contained instruction set (plus any helper scripts) you drop into a folder for the agent to pick up; a repeatable capability rather than a one-off prompt. OpenCode discovers them and the model can invoke them on request.
As a quick test I gave Gemma4 12B QAT Uncensored a playwright-cli skill and asked it to open google.com, take a screenshot, and close the window. It did exactly that, saving the screenshot into the skill's folder. It's a neat example of a skill handing the model a capability it wouldn't otherwise have.
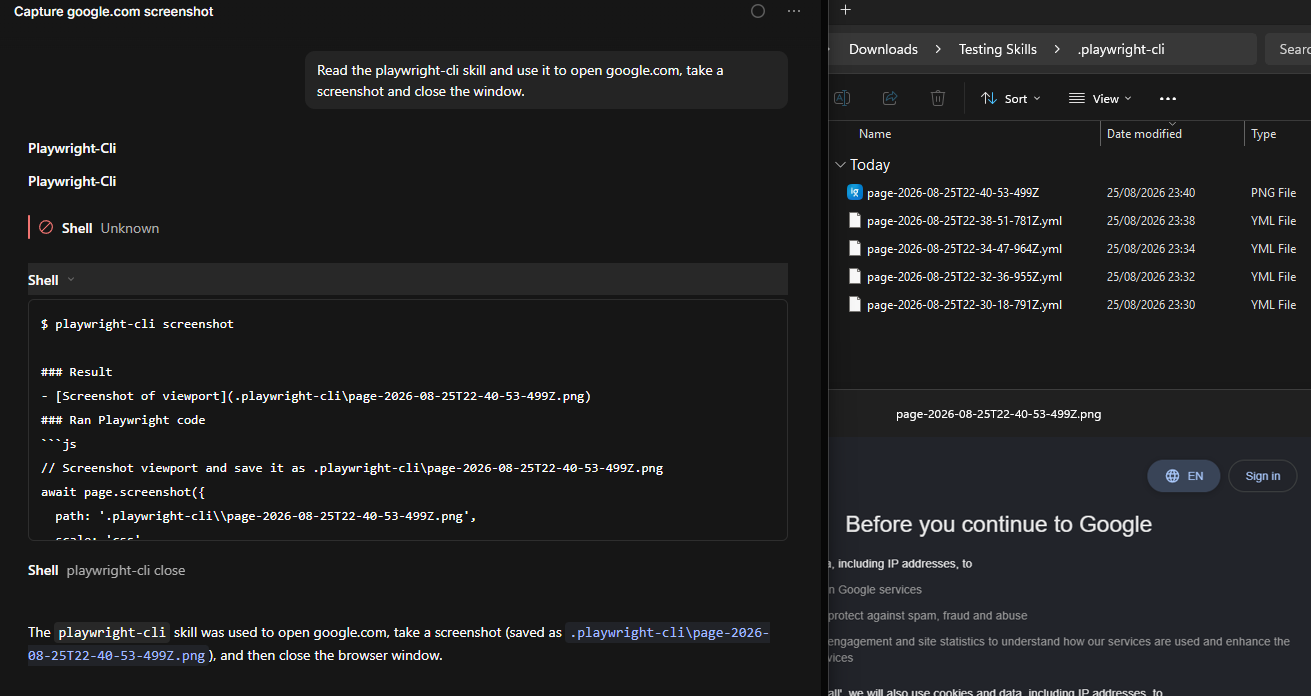
playwright-cli skill driving a browser from a plain-language request.Where This Leaves Me
The thing that stands out, looking back over nine months, is that everything got simpler. Rather than the stack getting more complex as it got more capable, it actually became leaner: fewer models, each with one clear job. The tooling got simpler too, less MCP rather than more, once OpenCode's native file tools removed the proxy layer I'd built last time. The voice layer went the same way, from a fragile scraper to a supported native path.
What's changed most, though, is the kind of question I find myself asking. Nine months ago it was "can I even run a capable model locally?" — and the answer now is a comfortable yes, on a mid-range gaming GPU, with several to choose from. The one I'm on now is a level up: "can I organise my own knowledge so a local model makes good use of it?" The command-vault is my first proper attempt, and from what I've seen so far it does seem to help. The next thing I want to poke at is browser automation with a local model — I've written Playwright scripts before, and something like Hermes Agent (an agent layer from Nous Research that sits on top of an LM Studio server and can drive a browser) looks like a natural fit. The part that intrigues me most is that it builds up a library of reusable skills as it works, so in theory it gets more capable the more you use it.